 After recently refitting my study, I was left with a somewhat troublesome problem of excessive reverberation times following the laying of a laminate wooden floor in place of the original carpet. While this would not unduly worry the majority of people, it was a significant concern to me as I regularly use my study for recording and editing audio; primarily podcasts.
On the face of it, laying an acoustically reflective surface as a flooring option would seem a particularly stupid idea if editing and recording audio in the room was going to be one of its key uses. However, as is so often the case in life, there were other factors competing in the equation that demanded consideration and therefore necessitated the now irksome wooden floor.
The Need for Change
 The choice of “purple” décor in my study was that of the house’s previous owners; not mine. After living with it for a number of years, I decided it was time for a change. As I spend a significant period of time in my study “nerding”, I chose to go for a clean, modern look and feel.
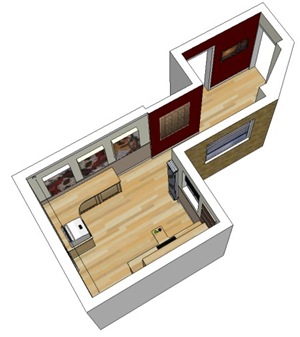
Prior to commencing the project, I measured the area in question and drew a 3D model of its basic layout using Google’s amazingly cool free 3D modelling software: Google SketchUp (see image to right).
Once I had the basic shell constructed, I then played with a few colour schemes and flooring options. My study only has one small window, making it quite dark at the best of times, so the original purple wallpaper was ditched in favour of clean walls painted in a light colour.
Flooring Options
My study was previously carpeted with a dark purple carpet, which while it made the room quite dead sounding, also darkened an already dark room.
I quickly decided on laminated wood as my new flooring of choice for a number of reasons. Firstly, I liked the look of it and felt it would help give the study a contemporary feel and create a more pleasing environment to work in. Secondly, it was light coloured, which would help lift the gloomy impression of the dark room. Finally, it was more durable and easy to clean, which was an important factor, as unfortunately I am confined to a wheelchair following an accident in July 2000.
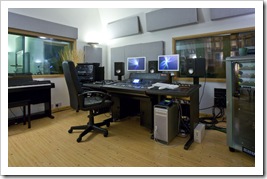 Despite my convictions that I had made the right choice to use wooden flooring, I remained nervous of its acoustic implications; potentially making the room very reverberant. On an encouraging note however, all of the recording studios and audio editing suites that I have visited in the past all had wooden flooring. So hopefully my decision wouldn’t come back to haunt me.
Secret Plan
Once I’d made the decision to use wooden flooring, I then started to consider the possibility of placing acoustic tiles on the wall directly behind me (when I was sitting at my desk). This was the largest wall surface in the study, so hopefully some large panels would be able to mop up some of the reverberant clutter.
Typical acoustic panels are not the prettiest things in the world, particularly when you’re considering using them in an essentially domestic environment. However, with a little research I discovered that you could get acoustic panels with artwork printed on acoustically transparent fabric. Something that would look good, plus be functional. Result!
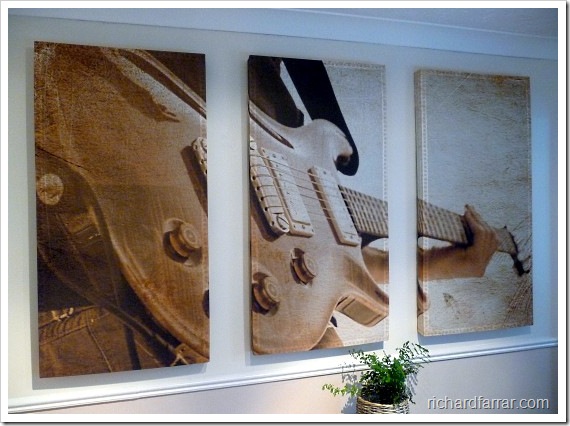
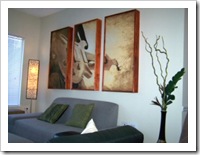 The first company I came across (Auralex) had an impressive range of artwork options for their Sonic Print panels, but nothing that really “worked” for me. I eventually settled on a company called GIK Acoustics after having seen a sample image of a guitar spread across 3 panels on their ArtPanel web page. Perfect, particularly as I was a guitarist in a former life.
Another hiccup however was that their standard panels were 2 foot x 4 foot, which would have been a little too tall for the wall I planned to put them on (a dado rail was in the way). Fortunately the guys at GIK Acoustics were very accommodating, and after much deliberation we managed to get the artwork to fit in a manufacturable way on a 2 foot x 3.5 foot frame.
Acoustic Performance
The acoustic art panels contain 2 inch thick mineral wool as the acoustically dampening material. While the manufacturer didn’t have acoustic performance results for the art panels, they did for their 4” panels. The results are apparently very similar, but with the thinner 2” panel not being as effective at the lower frequencies, rolling off at about 250Hz as opposed to 70Hz for the 4” panels. This isn’t too much of an issue for me as most of the audio work I do is speech based, which doesn’t tend to contain a large amount of energy in the low frequencies.
| Frequency | Absorption Coefficient |
| 80 Hz | 0.46 |
| 100 Hz | 0.63 |
| 200 Hz | 1.61 |
| 400 Hz | 1.79 |
| 800 Hz | 1.23 |
| 1,600 Hz | 0.85 |
| 2,000 Hz | 0.80 |
| 3,150 Hz | 0.68 |
| 4,000 Hz | 0.68 |
| 5,000 Hz | 0.66 |
The End Result
When my study decoration project was initially completed (without the acoustic panels) the reverberation times in the room were quite high, making any recordings sound rather echoey. However, when the acoustic panels were installed the difference in sound was amazing; initially it sounded almost like an anechoic chamber to my ears as I’d become so accustomed to the live sounding room.
The acoustic art panels have certainly been very effective in taming the room’s reverberation, probably now down a normal level or even a bit below. I’m sure for true professional standards more would be required, but they’ve done exactly what I wanted and look really cool too.
I think I’ll live with the room as it is for a while before I rush into any decisions regarding further acoustic treatment, but as things stand I can highly recommend acoustic art panels as an ideal solution for a domestic environment: nice artwork plus acoustically functional.

Good sites 🙂
I like the look of your blog.
Ki$$ for U 🙂