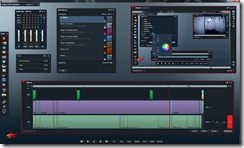
 This tutorial demonstrates how to create a CCTV type effect from regular video footage using the Lightworks video editor. The final result mimics footage captured on a typical analogue surveillance camera system.
The techniques described in this article show how to manipulate footage from a standard video camera to create the look and feel of footage caught on a CCTV camera security system by layering together multiple effects.
While this tutorial uses Lightworks as the video editor of choice, the basic principles should be equally applicable to other video editors such as Final Cut Pro, Adobe After Effects and Sony’s Vegas Pro.
The Aim
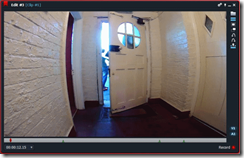
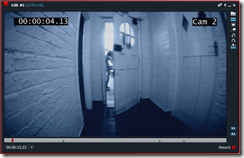
The aim of this tutorial is to create the look of a typical CCTV camera system from regular video footage to produce something like:
to
The overall result is achieved by layering simple individual effects together, and as such should be readily achievable in many common video editing systems.
Getting Started
First things first, you will need to either create a new project or open an existing project in Lightworks to edit your raw footage.
If you are not familiar with Lightworks then I would highly recommend following the excellent tutorials on their website before attempting to go any further. Lightworks can be a bit daunting at first, but is worth persevering with as it is an amazingly powerful and flexible video editor.
Eight Steps
To achieve the result we are after we need to combine the following 8 effects together:
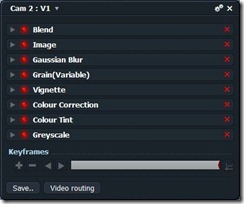 Greyscale (B&W)
- Colour Tint (Blue)
- Contrast Adjustment
- Vignette
- Grain
- Gaussian Blur
- Scan Lines
- Time Code Overlay
1: Greyscale
 While modern CCTV footage is probably more likely to be colour these days, here we are trying to produce the “effect” or “illusion” of CCTV footage. For this reason we will make the footage black and white to enhance the CCTV feel of the final result.
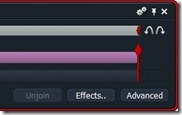
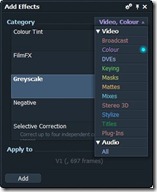 With your video clip selected in the editing timeline, click on the Effects.. button in the bottom right hand corner of the timeline to bring up the Add Effects panel.
From the upper right hand corner of the Add Effects panel click on the small arrow to drop-down a list of effect categories and select the Video, Colour category.
From the list of colour effects, select the Greyscale effect. Your selected clip should now be displayed in black and white.
2: Colour Tint: Blue
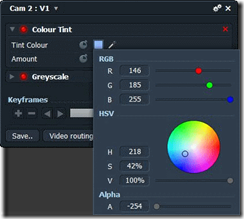 For this particular CCTV effect we are going to add a slight blueish tint to the image using the Colour Tint effect. This should help to make things “feel” a little more like monochrome analogue video.
This effect can be added in the same basic way as described previously:
Effects.. > Video, Colour > Colour Tint
Once you have this effect loaded into your effects chain it then needs to be configured by clicking the small arrow at the top left hand corner of the effect to open the effect’s configuration window.
With the effect’s configuration panel expanded, click on the Tint Colour colour box to choose a colour that you’re happy with for this effect. Leave the Amount set at around 50%.
3: Contrast
Next we need to tweak the contrast of the original footage by adding and configuring the Colour Correction effect:
Effects.. > Video, Colour > Colour Correction
Tonal Ranges, Contrast: 1.38, Gain: 0.87
4: Vignette
The next effect to add to the effects chain is a vignette. A vignette darkens the image around it’s corners mimicking the effect of cheaper camera systems and lenses.
This effect is not native in Lightworks, but can be downloaded from the Lightworks forum together with simple instructions on how to install it.
Once you have loaded the effect to Lightworks, it’s use and configuration is just like any other effect:
Effects.. > Video, Stylize> Vignette
Master, Amount: –55.00%
5: Grain
To enhance the feeling of a poorer quality camera system we need to add some graining to the image. Again, the graining effect is not a native effect in Lightworks, but can be downloaded and installed as for the vignette effect.
To add and configure this effect once installed:
Effects.. > Video, Stylize > Grain (Variable)
Strength: 8.00%, Size: 3.60, Grain Blur: 4.80%
6: Gaussian Blur
Again, to further the look of poorer quality video we can blur the whole image a little:
Effects.. > Video, Stylize > Gaussian Blur
Amount: 100%
7: Scan Lines
To make the video look like an old analogue TV or CRT signal we need to mimic raster scan lines on the image. This requires overlaying an image of scan lines on top of our video footage. You can download the scan line image that I created for this, or you could create your own if you’d prefer.
To use this image, add the Image Key effect:
Effects.. > Video, Keying > Image Key
This adds two individual effects to the effects chain; Image and Blend.
Open the Image effect and select your chosen scan line image.
With the scan line image selected we then need to open the Blend effect to set the level of the image’s Opacity to produce our desired result:
Opacity: 46%
8: Time-code Overlay
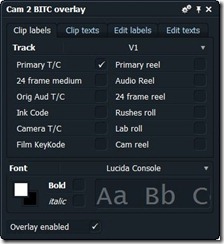 The final icing on the cake is to add a time-code overlay.
To do this click on the cogs icon at the top right hand corner of the edit view window and select BITC Panel from the drop-down menu. This should open the BITC Overlay option menu.
From the BITC Overlay window select one of the time-codes that you’d like to display as an overly from the Clip Labels tab, e.g. Primary T/C.
Once the time-code is displayed in the edit viewer window you can drag and drop it to any area of the image that you choose. Dragging the edge of the text box enables you to enlarge the box size to suit.
Ensure that the Overlay enabled box is ticked and that should be your CCTV video effect created!
Experiment
While combining the individual effects above produces a passable CCTV type effect, once you have the basic effect configured, feel free to play with the individual component effects, or even remove or replace them altogether to produce your own effect.
Consider this effects chain as a starting point for your own creativity.
Video Tutorial
If you’d like to see the exact process for creating this effect first hand, please watch the following video tutorial of the process:

This tutorial was amazing! Did my CCTV effect in 10 minutes!
Thanks very much, glad you found it helpful.